

API keys
A single key for a dedicated API user in your own workspace. Best for internal scripts and back-office jobs.
OAuth apps
Each person authorizes your app themselves, with scoped, revocable, audited access. Best for integrations that other people connect to.
How it works
1
An admin registers the app
A workspace admin creates the app in Campfire, picks the most it may ever access (its scopes), and gets a client ID and client secret.
2
A person authorizes it
Your app sends the person to Campfire’s authorize URL. They sign in, review what the app is asking for, choose a workspace, and click Authorize.
3
Your app exchanges the code for tokens
Campfire redirects back to your app with a one-time
code. Your server exchanges it, along with the client secret, for an access token (valid for 1 hour) and a refresh token (valid for 30 days).4
Your app calls the API
Your app sends
Authorization: Bearer <access_token> on API requests. Campfire treats each request as that person in the chosen workspace, limited to the scopes they granted.Creating and managing OAuth apps requires a Campfire admin. Anyone in a workspace can authorize an app, but the app can never do more than that person is already allowed to do.
Part 1: Register your app
1
Open the Apps page
Go to Settings > Developer > Apps. If you haven’t created an app yet, you’ll see the empty state. Click Create App. Once you have at least one app, the button is New App in the top right.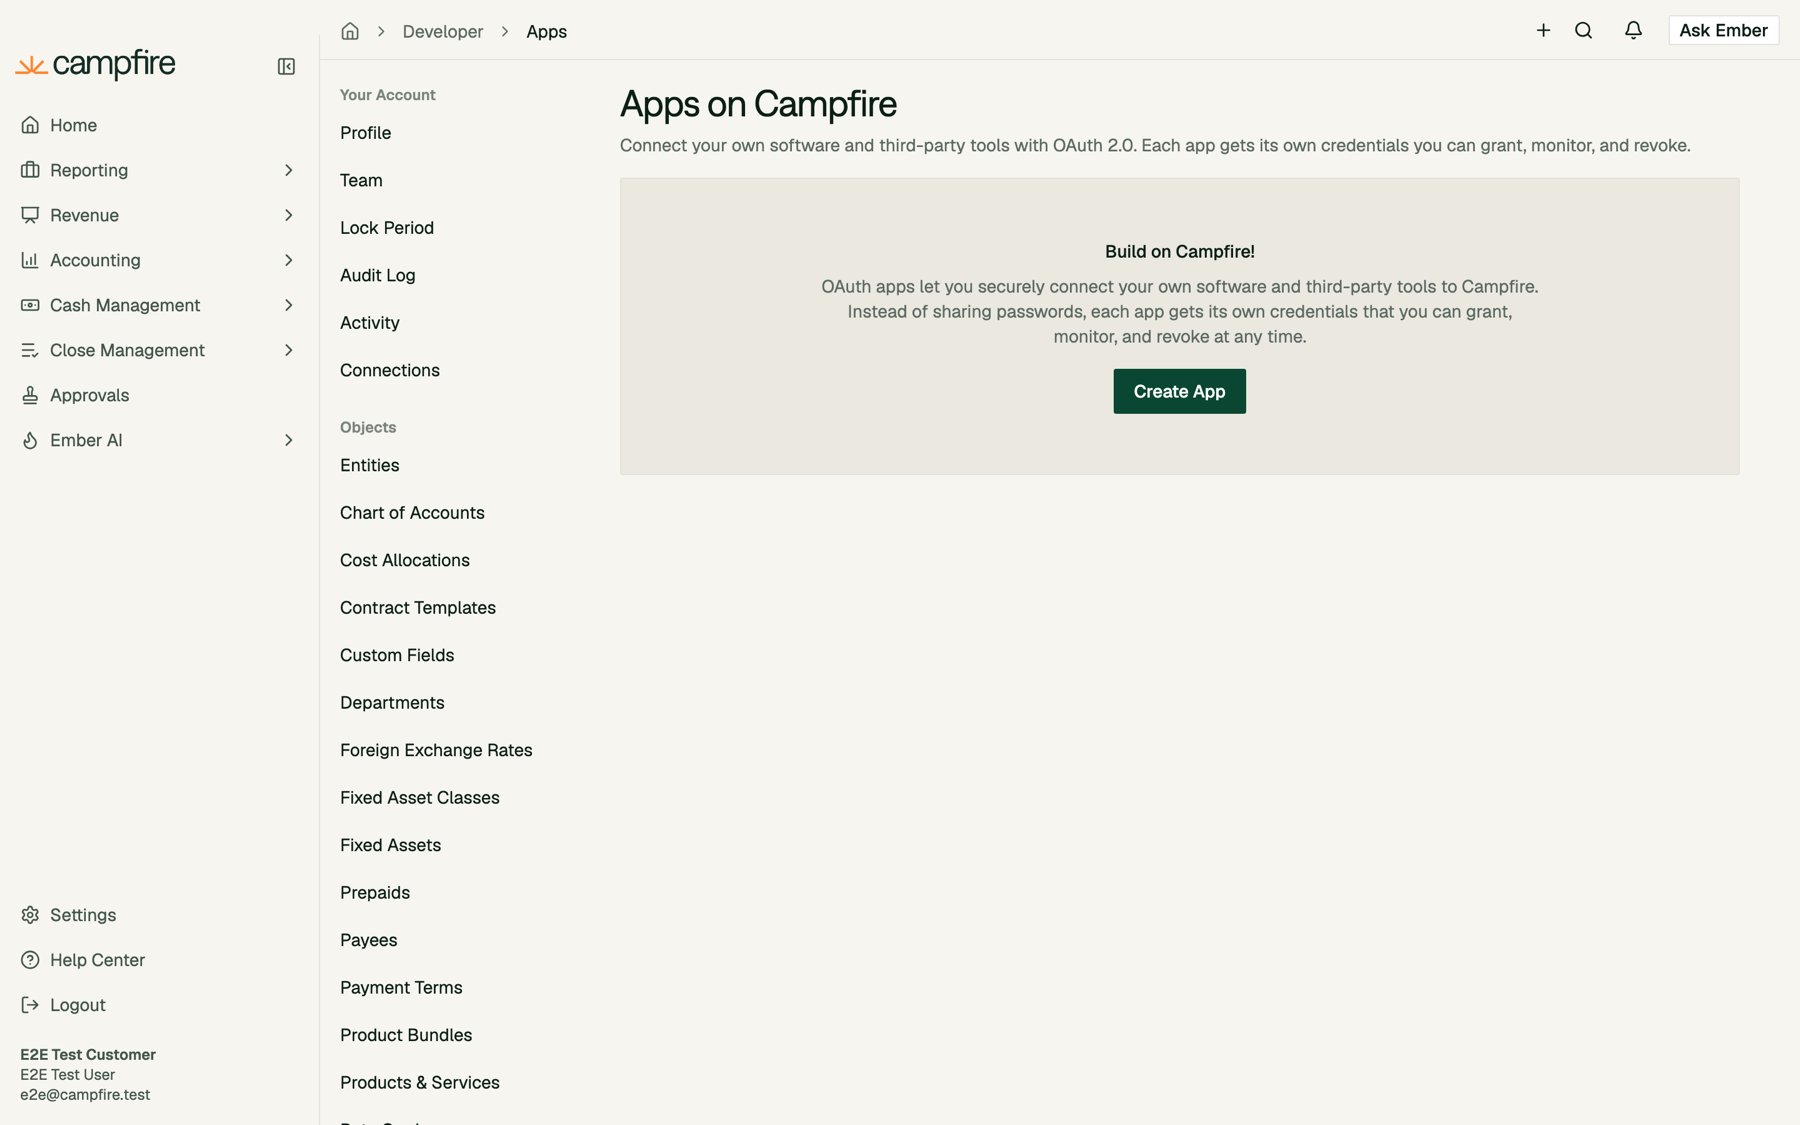
If you don’t see Apps under Developer, contact your Campfire support team to have OAuth apps turned on for your workspace.
2
Fill in the app details
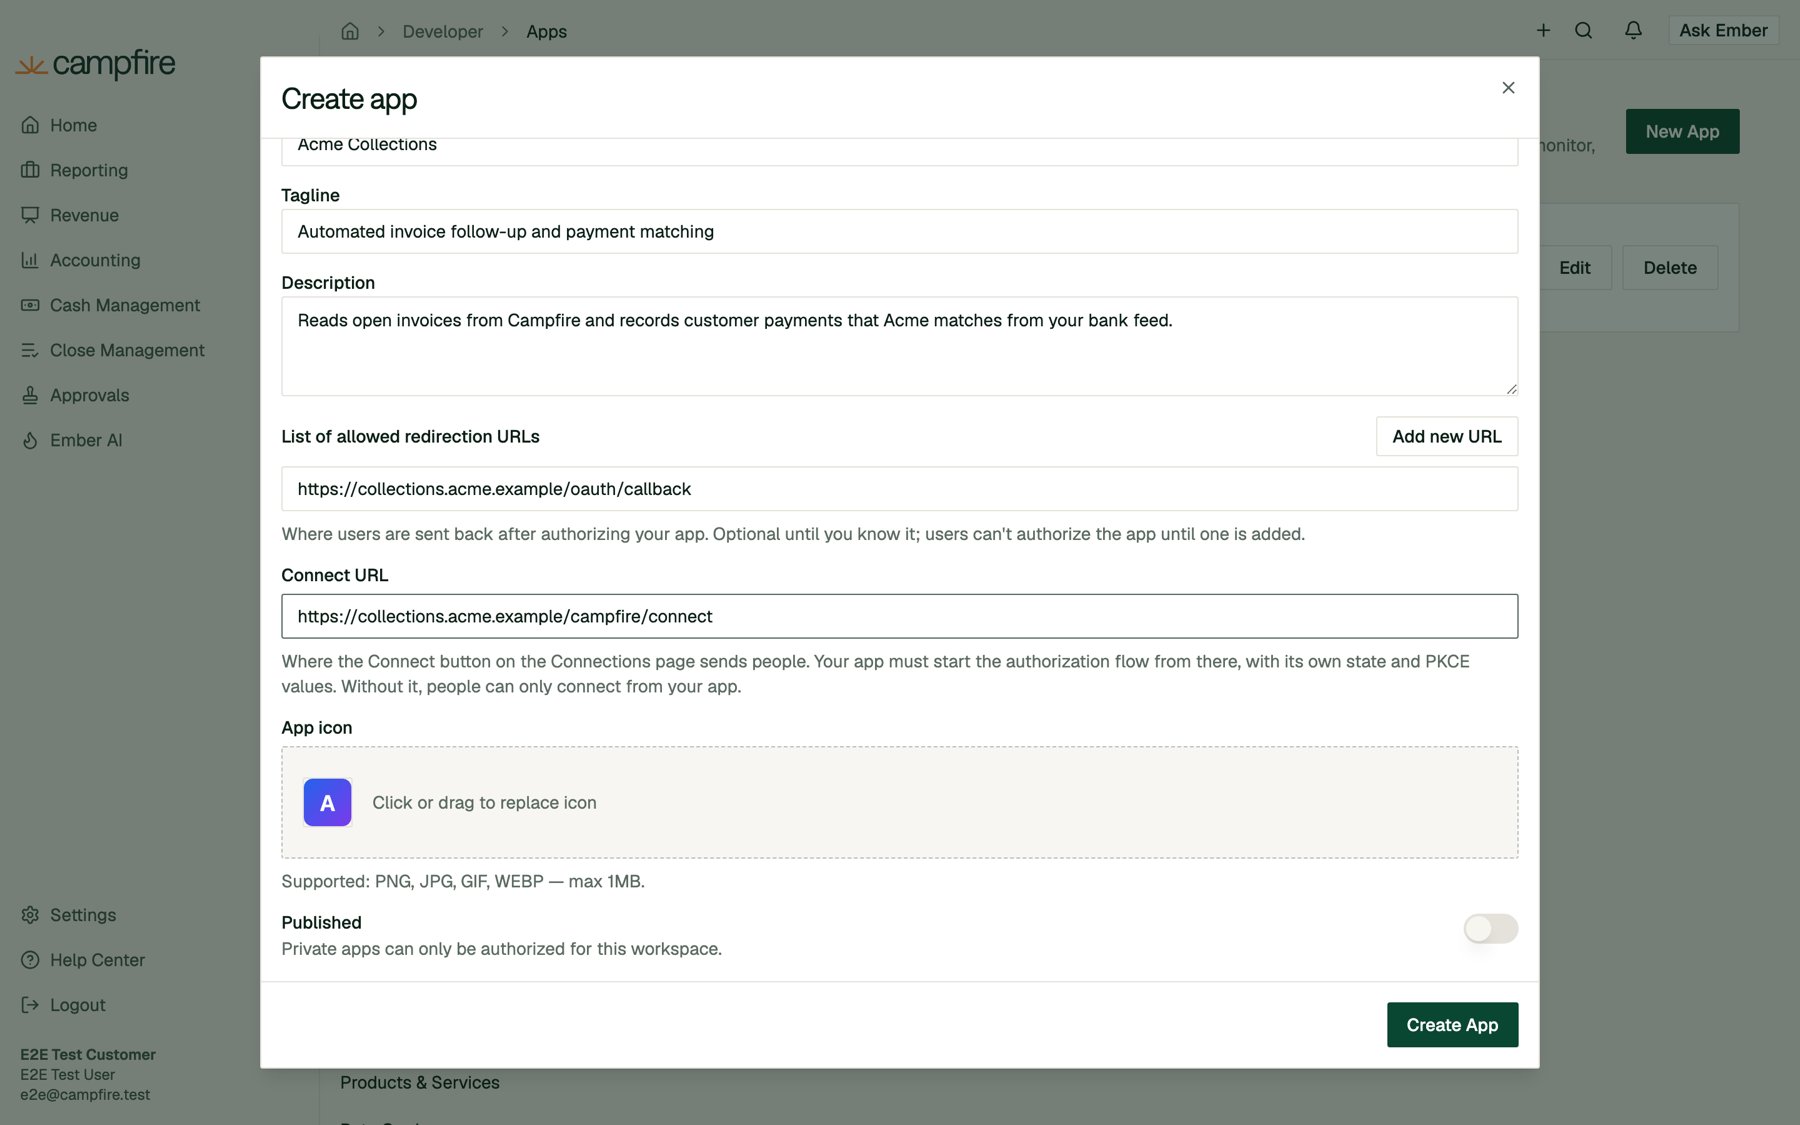
The Details tab describes your app to the people who will authorize it.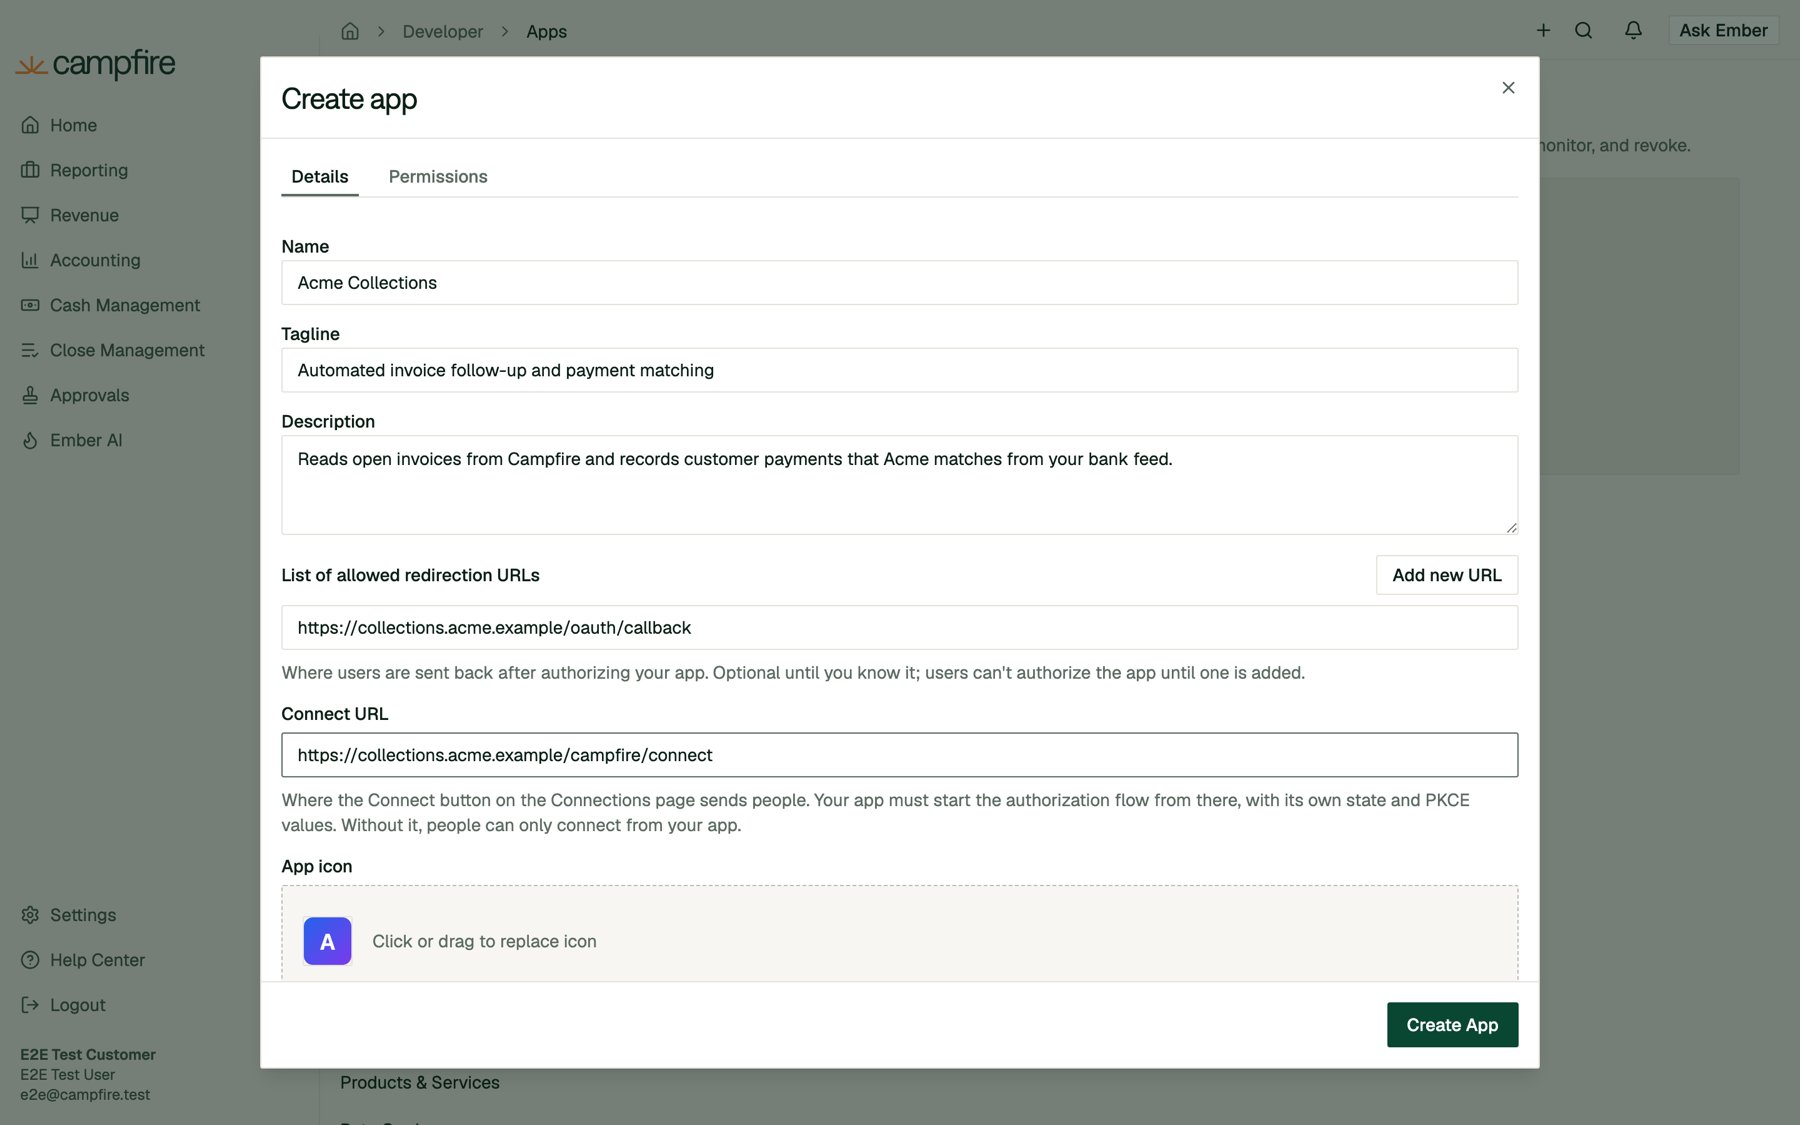
3
Choose the app's permissions
Switch to the Permissions tab and check the access your app needs. These scopes are the ceiling: the most the app can ever request. People connecting the app are still limited to their own permissions in the workspace they choose.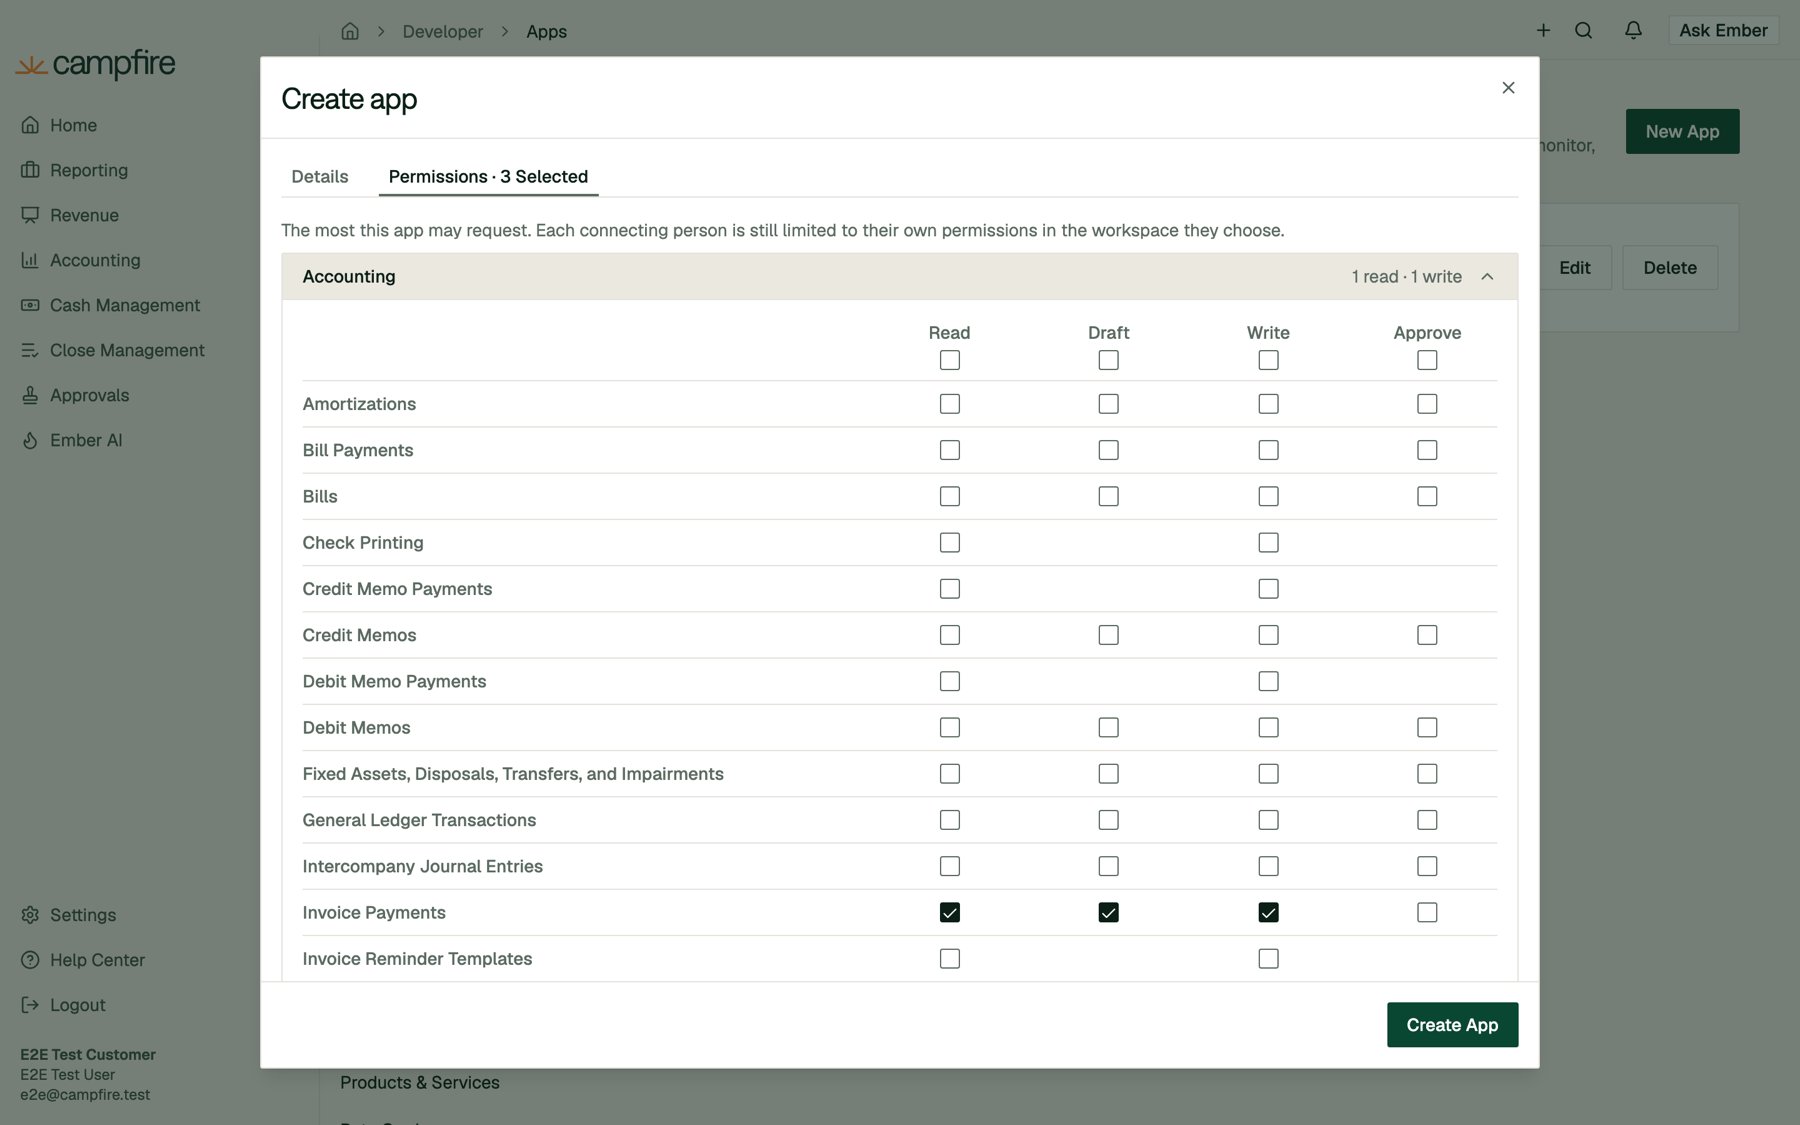
A higher tier includes the lower ones. For example, checking Write on Invoice Payments also checks Read and Draft. Only check what your integration actually uses. You can widen the scopes later without affecting existing connections.
4
Save and copy your credentials
Click Create App. Campfire shows the app’s credentials: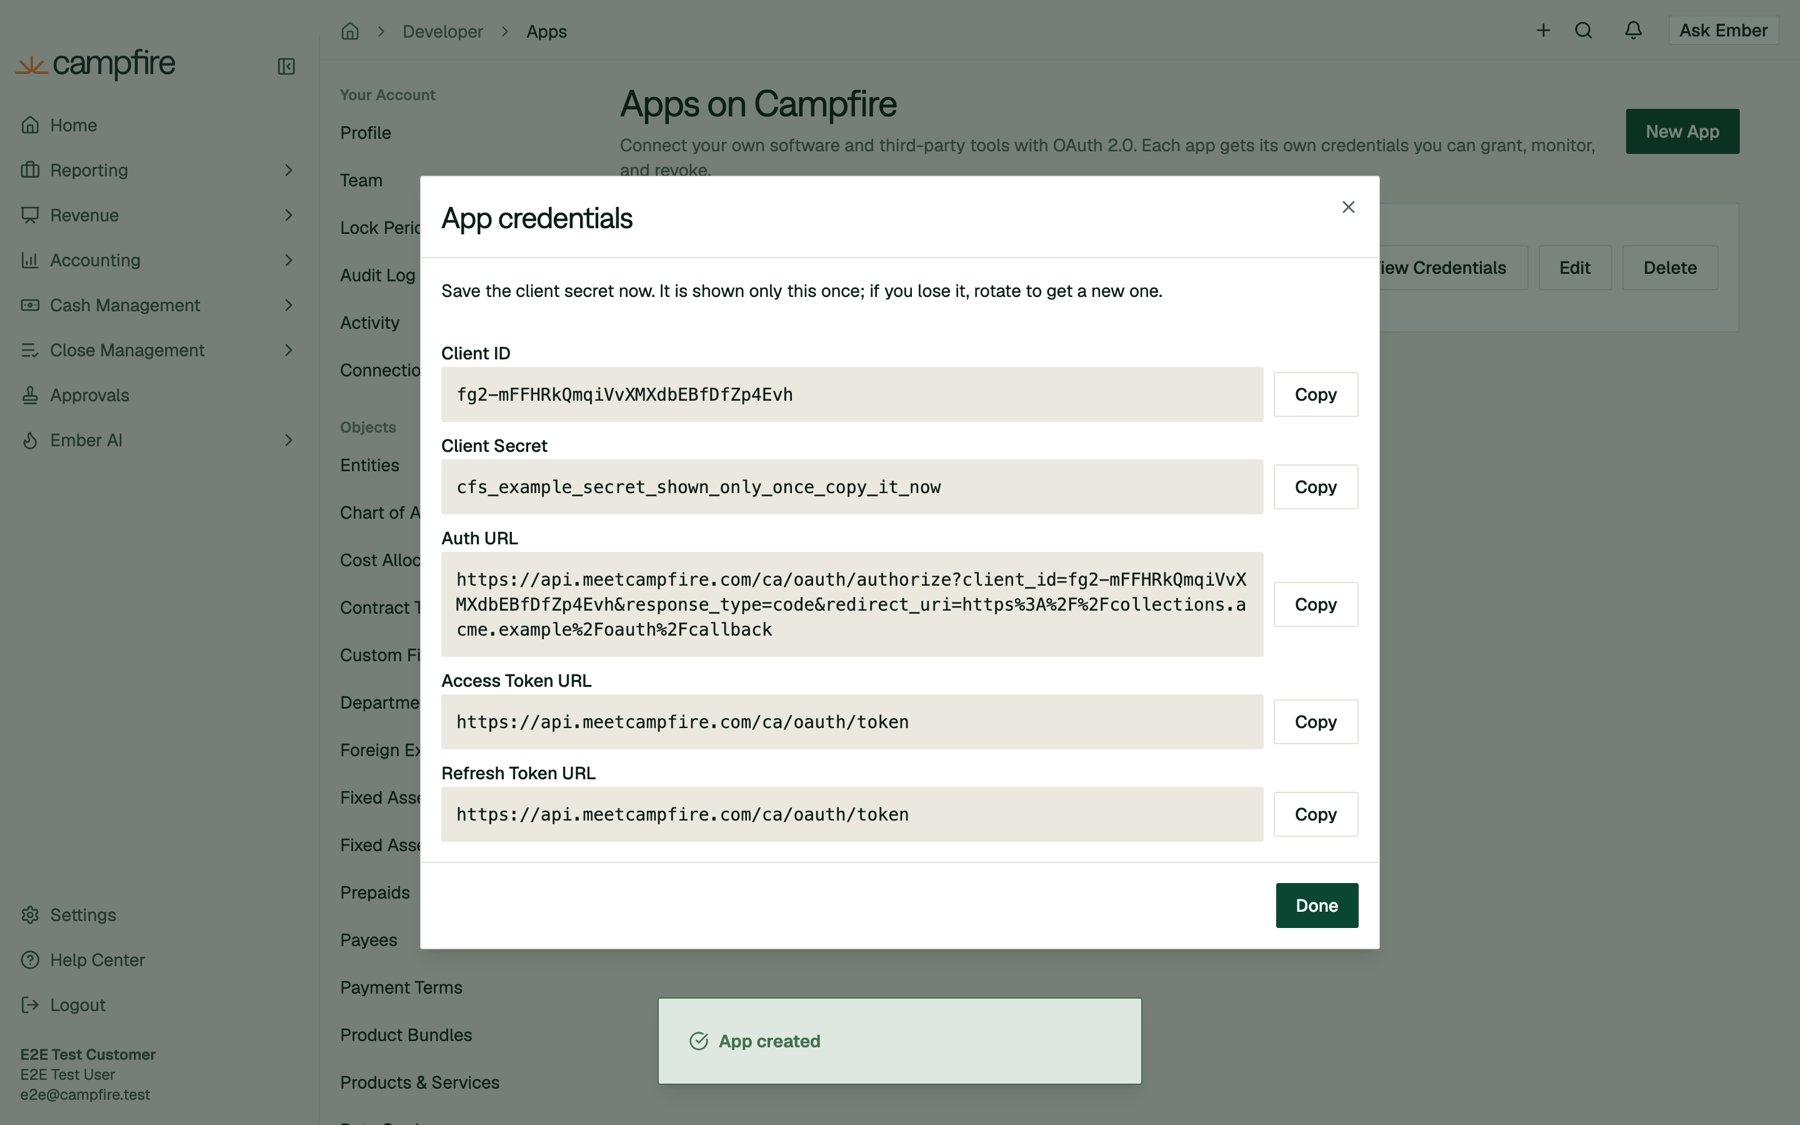
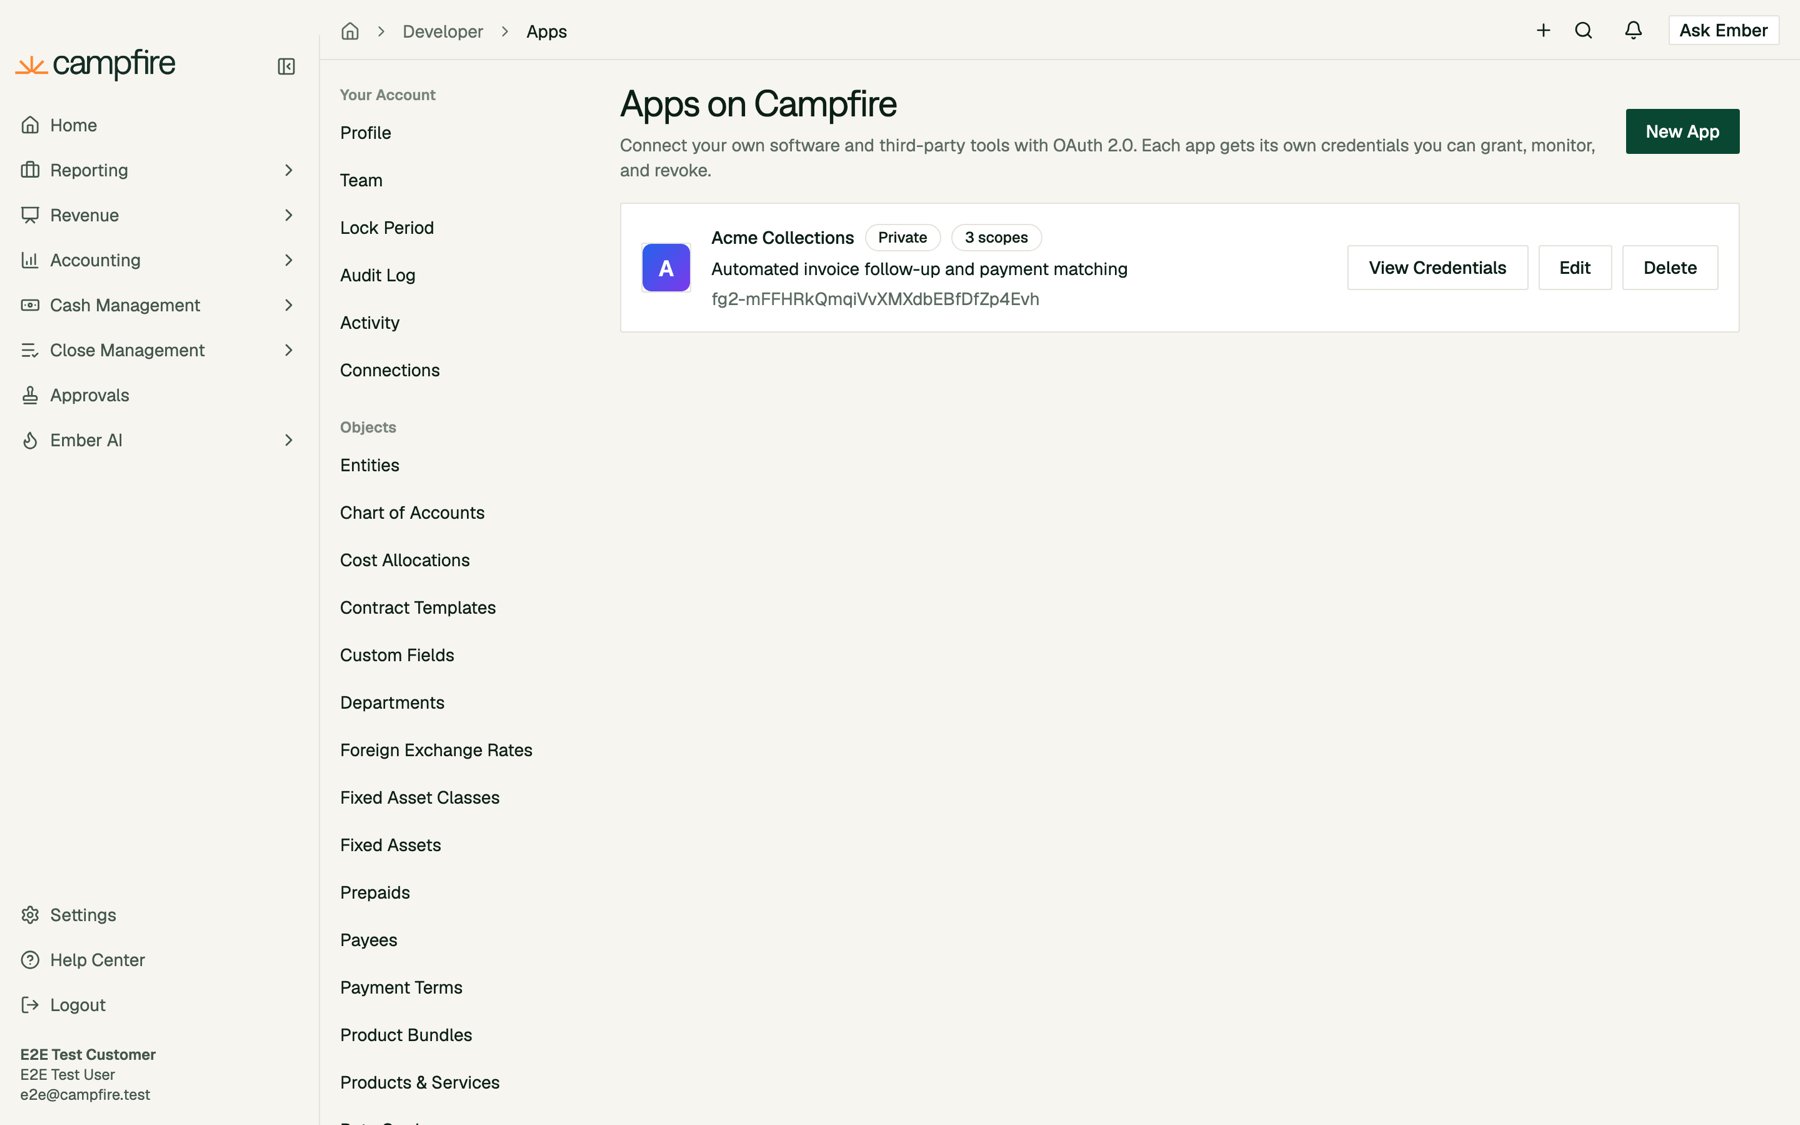
Your app now appears on the Apps page with its sharing status, scope count, and client ID:
Part 2: Implement the authorization flow
The examples below use these endpoints:Step 1: Send the person to Campfire
Generate a randomstate value and a PKCE verifier, store both in the person’s session, then redirect them to the authorize endpoint:
Here is how to generate the PKCE pair:
Step 2: The person approves access
If the person isn’t signed in, Campfire asks them to sign in first. They then see the consent screen, which shows your app’s icon, name, tagline, and a plain-language list of what it will be able to do: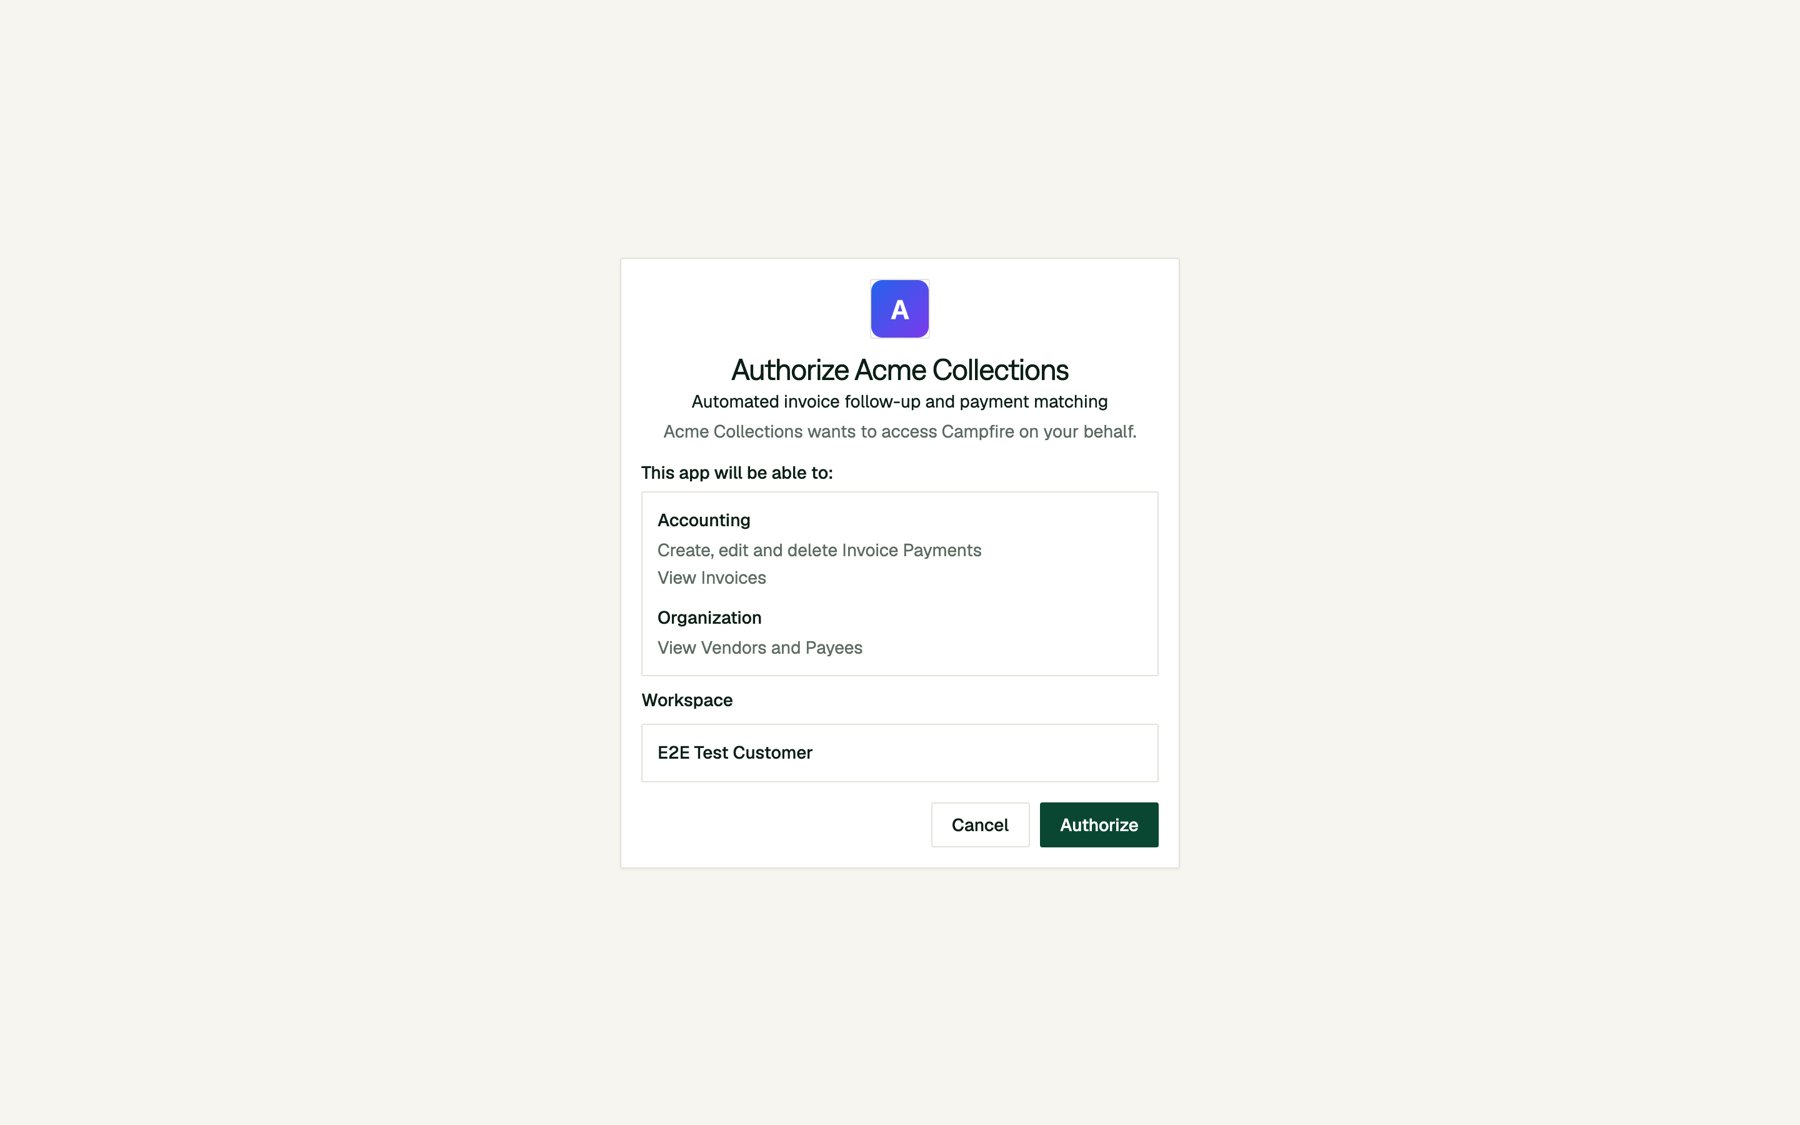
- Workspace. For a private app, the workspace is fixed to the one that created the app. For a published and approved app, the person picks one of the workspaces they belong to.
-
Authorize redirects to your
redirect_uriwithcodeandstate: -
Cancel redirects to your
redirect_uriwith an error:
state matches the value you stored. If it doesn’t, discard the code.
Step 3: Exchange the code for tokens
From your server,POST the code to the token endpoint within 5 minutes. Each code can be used only once. Authenticate with your client ID and secret, either with HTTP Basic auth (shown) or as client_id and client_secret form fields:
cfa_ and refresh tokens start with cfr_. Store both securely on your server, keyed to the person who connected. The scope field lists exactly what was granted.
Step 4: Call the API
Send the access token as a bearer token:permissions map is the effective access for this token: the person’s own permissions intersected with the granted scopes. The response above is shortened.
What a request can do. Each request runs as the person who authorized the app, in the workspace they chose. It can do only what both that person’s role and the granted scopes allow. An app never inherits admin privileges, even when an admin authorizes it.
When a scope is missing, Campfire returns 403 and tells you which scope you need in the WWW-Authenticate header:
Some endpoints are not available to OAuth apps and return
403 with "This endpoint is not available to OAuth apps." Account and credential management (API keys, OAuth app management, connections) is never available to app tokens.Step 5: Refresh the access token
Access tokens expire after 1 hour. Use the refresh token to get a new pair:Starting the flow from Campfire
If you set a Connect URL, people can also start from Campfire. Clicking Connect on your app’s page under Settings > Connections sends them to your Connect URL. Campfire doesn’t start the OAuth flow itself, because your app has to own thestate and PKCE values. Your Connect URL should do exactly what Step 1 does: generate state and a verifier, store them, and redirect to the authorize URL.
A complete example
This minimal Flask app implements the whole flow: connect, callback, calling the API, and refreshing.app.py
Part 3: Manage connections
Viewing connected apps
Apps connected to your account are listed under Settings > Connections. Connected apps appear in the Apps section of the All Connections and Active tabs, with the last time each one was used.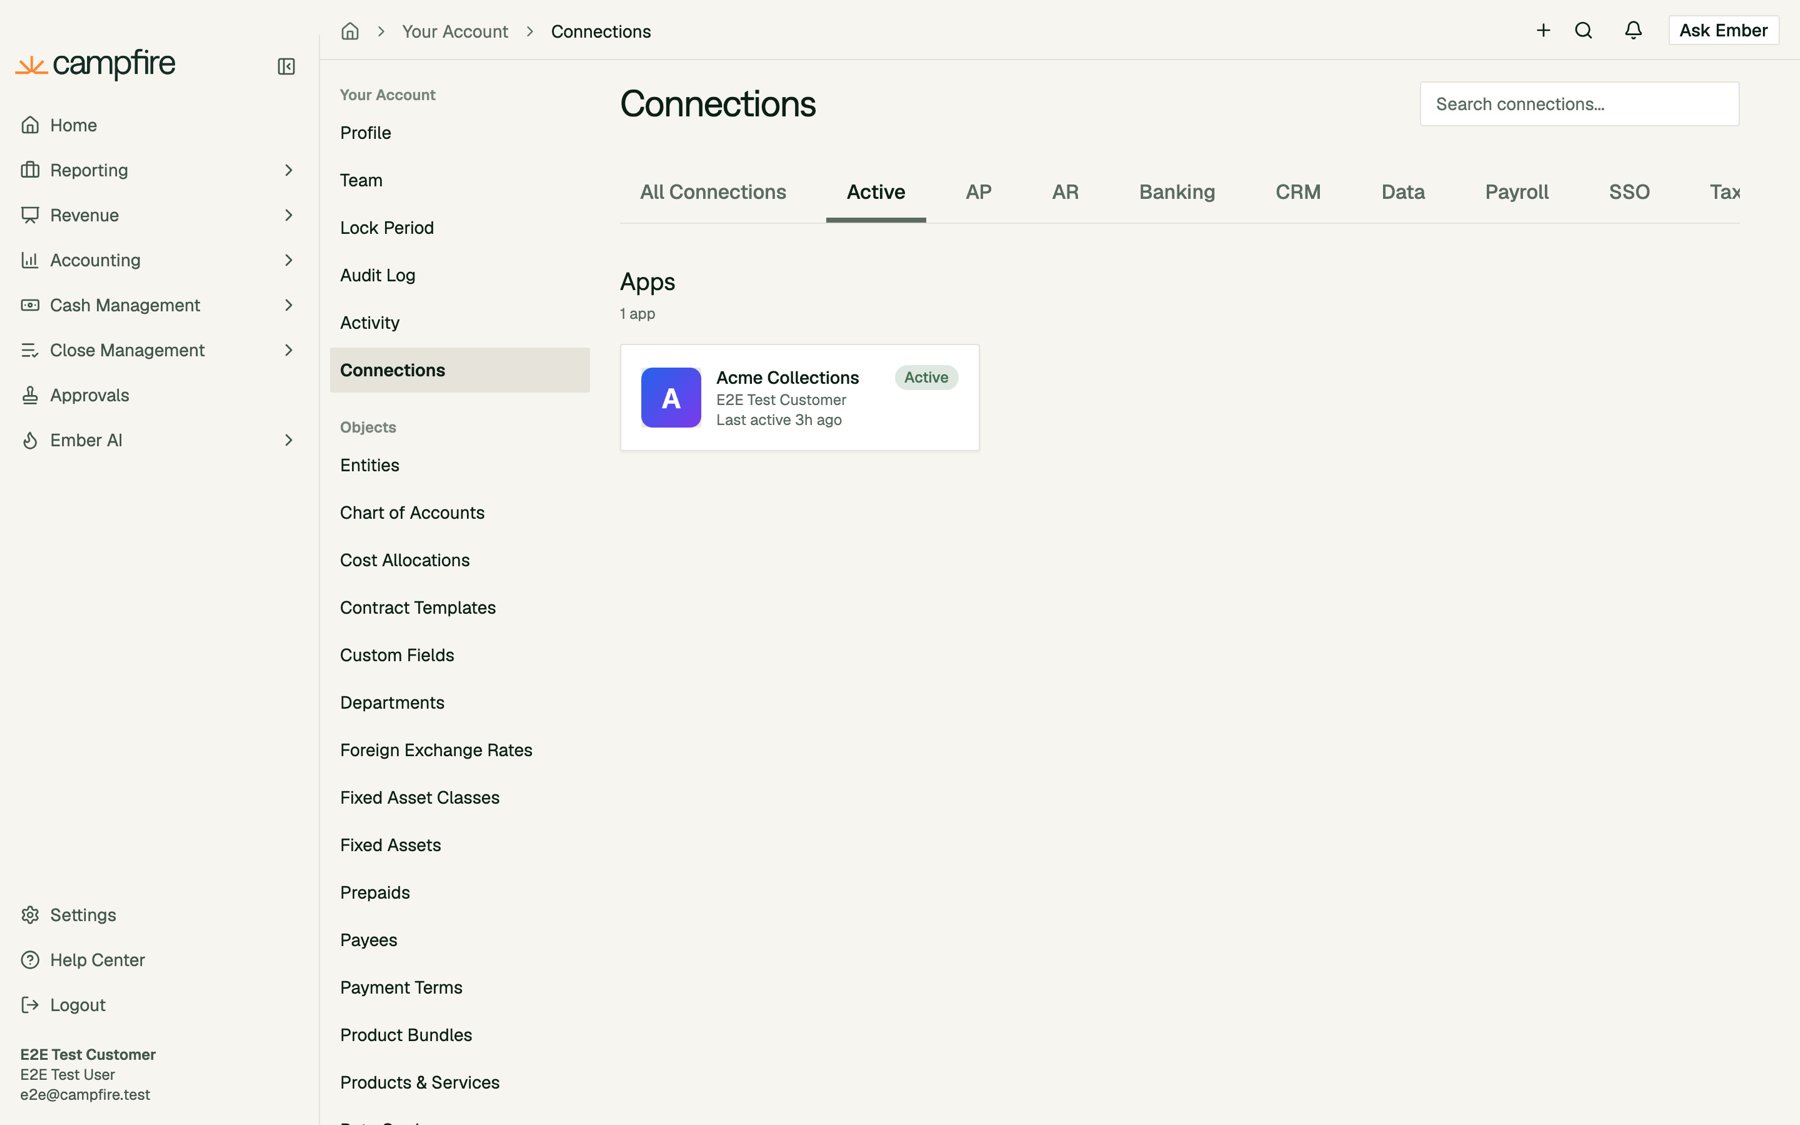
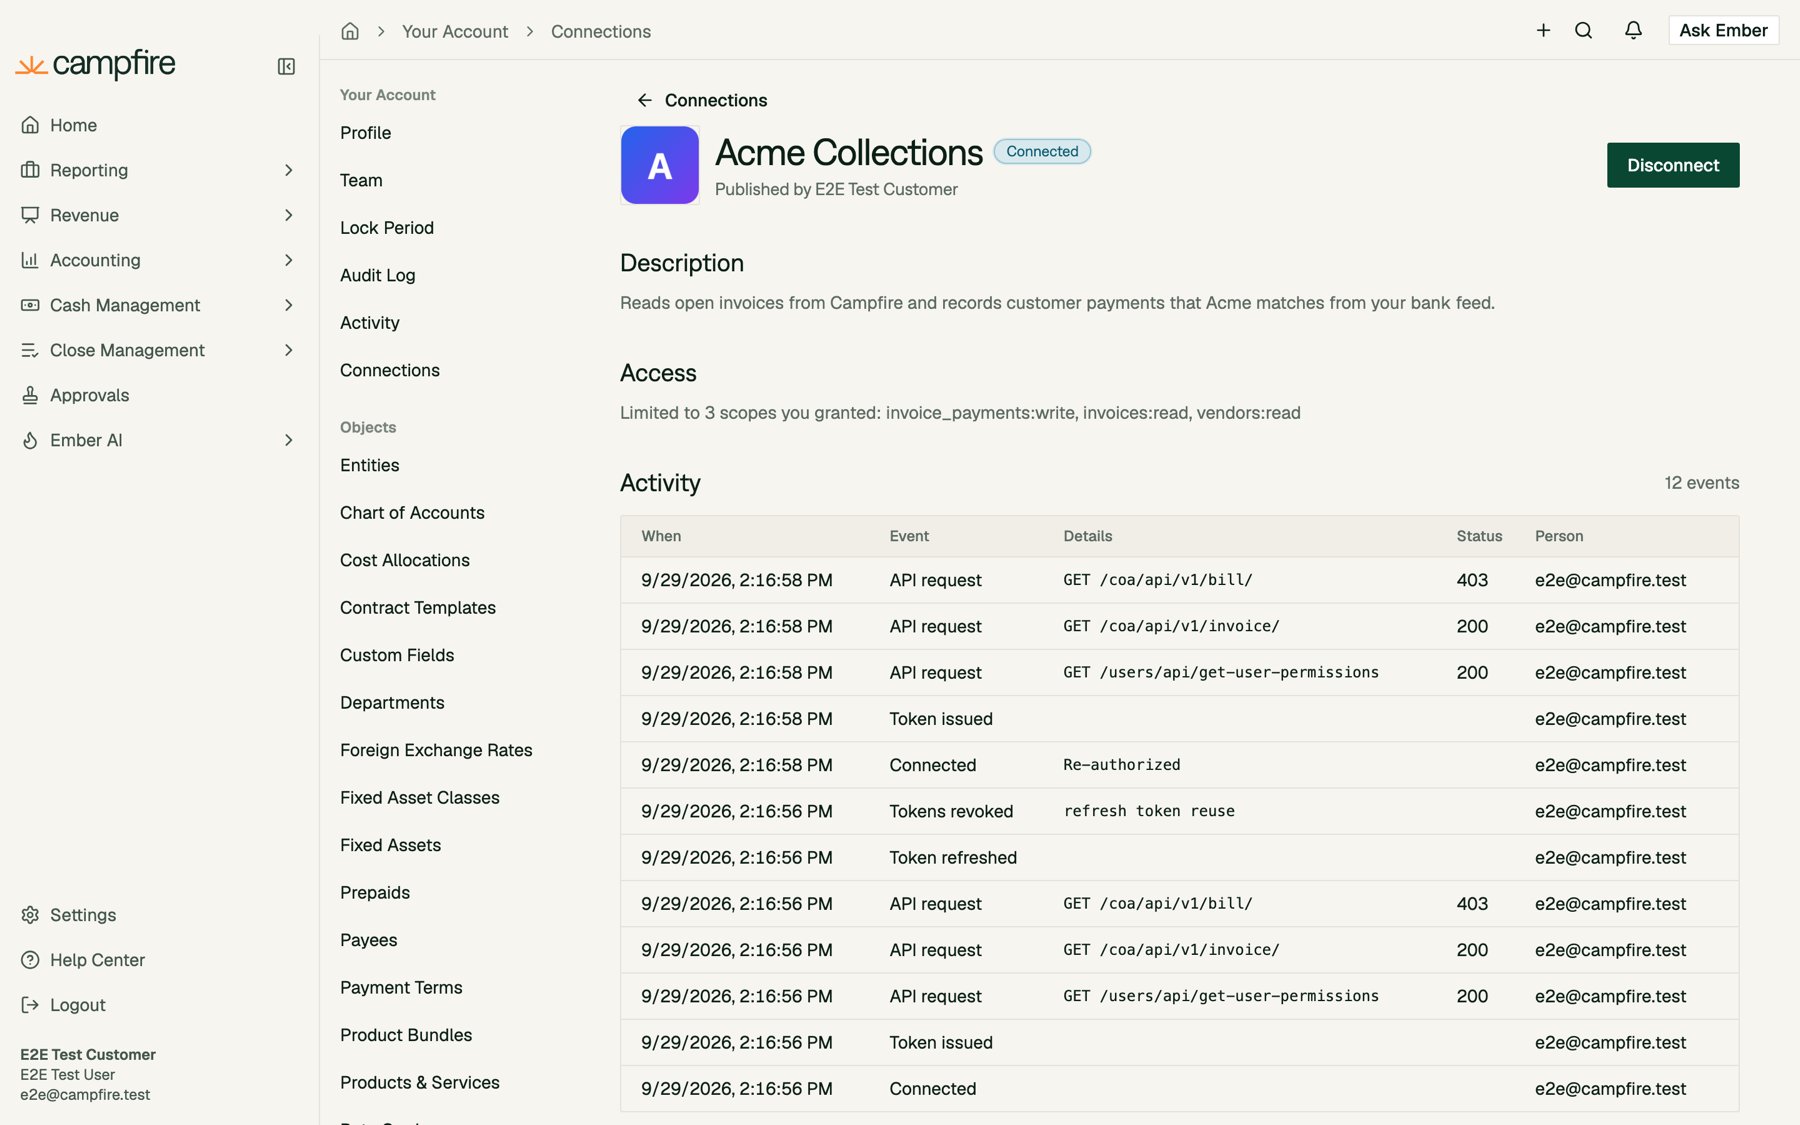
Disconnecting an app
Click Disconnect on the app’s connection page and confirm. The app’s tokens stop working immediately, and it has to be authorized again to reconnect.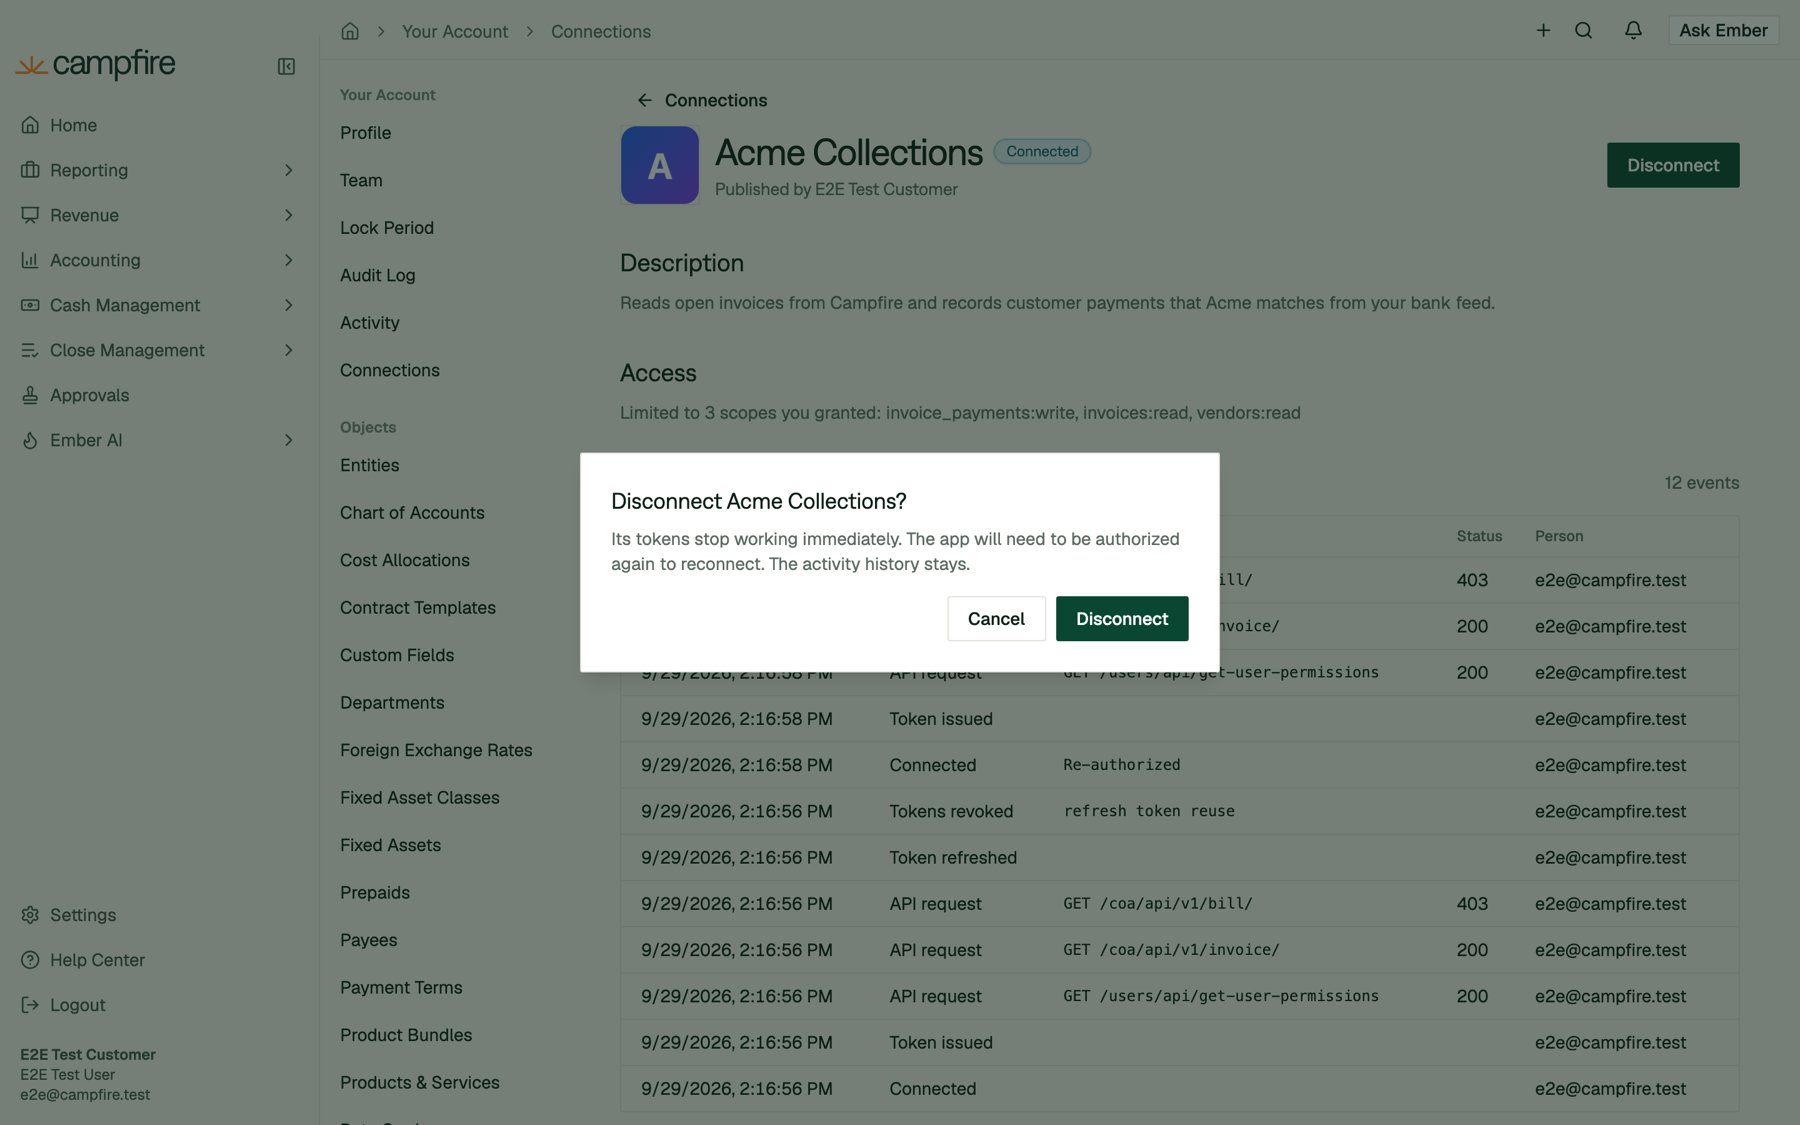
401:
401 on a refresh, or on a request made right after a refresh, as a lost connection and prompt the person to reconnect.
When access ends automatically
Besides an explicit disconnect, Campfire revokes a connection’s tokens when:
Widening an app’s permissions never changes existing connections. People keep what they originally granted until they authorize again.
Part 4: Manage your app
From Settings > Developer > Apps, each app card has View Credentials, Edit, and Delete buttons.Rotating the client secret
Click View Credentials. After the first time, the secret is hidden. Click Rotate secret to generate a new one, which is shown once.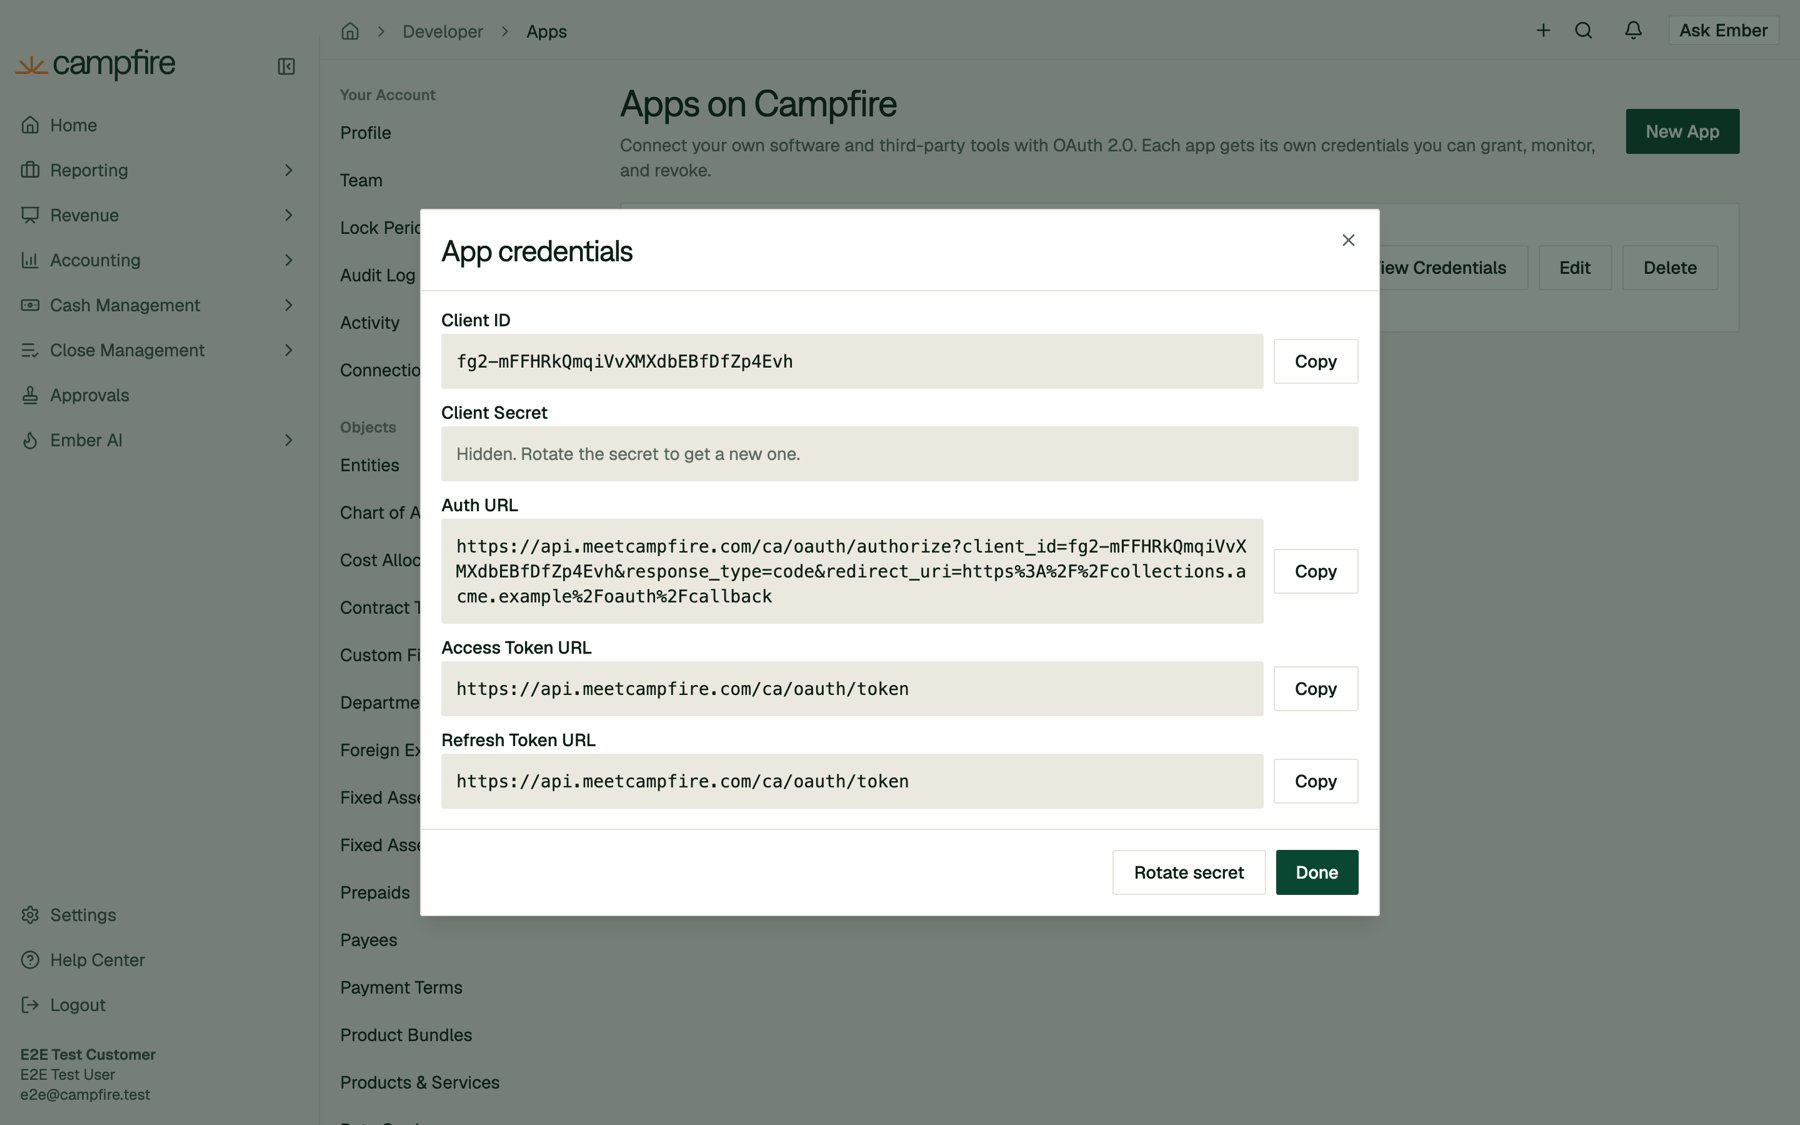
Editing and deleting
- Edit changes the name, tagline, description, redirect URLs, Connect URL, icon, publishing, and permissions. See When access ends automatically for how permission changes affect existing connections.
- Delete asks for confirmation. The app’s credentials stop working immediately and every connection is removed. This cannot be undone.
Private vs. published apps
Publishing is a two-step process. Turn on Published in the app’s details, and the card shows Pending approval. Once Campfire reviews and approves the app, it becomes Published. Until then it behaves like a private app. To request a review, contact your Campfire support team.
Scopes reference
Scopes have the form<resource>:<tier>, for example invoices:read or bills:write. Request them space-separated in the scope parameter. A higher tier includes lower tiers (write includes draft and read). approve is separate and only covers itself.
Accounting
Accounting
Revenue
Revenue
Reports
Reports
Cash Management
Cash Management
Close Management
Close Management
Organization
Organization
Ember AI
Ember AI
Errors and troubleshooting
Authorize endpoint
If theclient_id or redirect_uri is invalid, Campfire can’t safely redirect back to you. It responds with 400 and a JSON detail instead:
All other problems redirect back to your
redirect_uri with error, error_description, and your state:
The consent screen itself can also show Authorization unavailable. This happens if the request expired (the person took more than 10 minutes), was already used, or the person doesn’t belong to the workspace a private app is locked to. Start the flow again from your app.
Token endpoint
Errors follow the OAuth 2.0 format:{"error": "...", "error_description": "..."}.
API requests
Security checklist
- Keep the client secret on your server. Never put it in front-end code, mobile apps, or source control.
- Always send and verify
state. - Use PKCE (
S256) on every authorization. - Request the fewest scopes you need. Prefer
draftoverwritewhen a human should review changes. - Store tokens encrypted, and save each new refresh token before using the new access token.
- Handle
401by refreshing once, then prompting the person to reconnect. - Rotate the secret immediately if it may have leaked. This also revokes every existing token.
Need help? Contact your Campfire support team and we’re happy to help you build your integration.